No Products in the Cart
Whether it's a flat tire or you drive so much that you wear out the tires , there will come a time when you need to remove your Mi Electric Scooter tires and inner tubes . If it's your first time, it can be a daunting and complex procedure . In this article we have documented the approach we use to remove/replace the tires and tubes on the scooter.
Disclaimer : As always, everything you do on your scooter is your responsibility. RC Geeks cannot be held responsible for any damage caused to you or your scooter as a result of following our methods.
This is a tough task and we're not here to sugarcoat it, but here are some tips that might help (if you don't have time to read this article):
If you really can't make it, go to your local bike shop . An experienced bicycle mechanic should be able to help you.

A few special tools are required to make this job uncomplicated:

You may have some bike tire levers at home. You might think they will get the job done. If you try hard enough and swear, you might get away with it . Instead, grab a set of these foot-length metal tires (for motorcycle tire mounting) from eBay to make your life easier.
In our experience this is the bike that seems to get more flats, luckily it's the "easier" bike to work with.
1. Position the scooter where you can comfortably work, fold it up and place it upside down or on its side (window side down) on a work surface. Remove the valve cap and set it aside safely. Use a tool to deflate the tube and squeeze the tire to get as much air out as possible.


2. Take a scalpel or pickaxe and remove the plastic trim strip (the whole piece, not just the top red sticker) from the back screw cover.

3. Once removed, use the 2.5mm hex wrench to remove the two screws that secure the cowling. Pop off the trim piece and set these pieces aside.

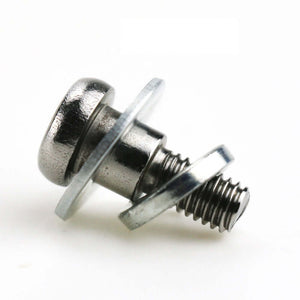
4. Take the Allen/ 4mm hex key and unscrew ( counterclockwise ) the axle bolt. Be sure to save this, the spring washer and the plain washer. You should have all of these parts removed so far.

5. With the wheel still attached, squeeze the tire and slide the tire lever under the bead.

6. Rotate the wheel supporting the lever from the scooter frame to loosen the bead from the wheel lip. This requires some strength.

7. Once it's about 1/3 loose, you can use your hands to pull the tire all the way off on one side.

8. Turn the scooter over (or move it to the other side) and repeat the process to remove the cowling, the two 2.5mm cap screws and finally the other 4mm axle bolt


9. Slide the wheel straight back out of the scooter. It may have to be wiggled to clear the caliper. Note the flats on the axle to locate it, which is important for later reassembly.

10. Once the wheel is out you can pull the tire to one side so you can release the tube and then take the wheel out yourself . This requires some grip strength, especially when the tire is cold. Try not to work with the disc side down as the disc can be easily warped causing it to rub against the brake pads as you spin.


11. Finally, wiggle the tube valve out of the impeller to loosen it. Your patience will be rewarded after a few minutes of fiddling. Pushing from the valve side may work if you're having trouble.


12. The tube valve is designed with a slight offset to match the wheel. Align the wheel accordingly.

13. Push the valve through the rim and secure it against falling out again with the valve cap.


14 . If you are replacing the tube due to a puncture, take some time to check the inside of the tire to make sure there is nothing inside that could damage the new tube. Next, align the tire so that the tread is facing the correct direction . With the brake disc "up" the tire rotates counter-clockwise as indicated by the arrows next to the size numbers on the sidewall, seen in the photo below:

15. Press the tire into an oval shape and insert the wheel and tube.

16. Gently tuck in excess inner tube with your hands. Pull the lip of the tire back from the wheel body to check that the tube is clear of the lip on both sides to avoid pinching. Twist the tire until the "rear" bead is on the disc side. A lever can help here, but it is possible with bare hands.

17. Place the wheel back into the frame , paying attention to the wedges for insertion. Install the top and bottom axle bolts and finger tighten only.


18. Rotate the tire so the valve is close to the footplate. Place the lever under the tire lip and turn the wheel counter-clockwise to clamp the tool against the frame.

19. Continue turning the wheel counter-clockwise with both hands , pushing the bead back under the lip until complete. The resistance increases as you rotate it. If you find that the tire wants to "pop" off the wheel, you can use zip ties that run around the tire and between the spokes to secure sectors of the tire while you work around.

20 . Replacing the screws and trim is the reverse of removal . Tighten the axle bolts but do not over tighten, use only hand tools. Remove the valve cap and inflate to the required pressure.
The bike is more difficult to work with . Unless you're trying too hard, you're working on it while tethered (via the power cord) to the frame and there are no spokes to help grip the wheel.
1. Position the scooter where you can comfortably work, fold it up and place it upside down or motor side up on a work surface. Use the pickaxe to remove the U bar (not just the sticker, but the whole piece).

02. Next, using your wrench, remove the four 2.5mm pan head screws and remove the plastic axle cover. Remove the valve cap and lower the tire .

03. Using the same wrench, remove the four short 2.5mm socket head cap screws that secure the plastic fork fairing to the metal forks.

04. Lift the plastic shroud away from the fork and use the open ended 18mm end of your wrench to loosen the lug nut . It comes off counter-clockwise, left loose, but we had to use some WD40 (and let it soak for a few minutes) to get it moving.

05. Slide the nut through the panel and slide it out of the way of the wire .

06. Use the pick to loosen the cable grommet on the frame. This will loosen the cord a bit, giving you more room to work.

07. Turn the scooter over and remove the panel with the pick. Use your screwdriver to remove the two 2.5mm cap screws , the plastic shroud, and the four 2.5mm short head screws underneath.


08. Lift the plastic of the fork and use the ring end of your wrench (if you have one) to remove the 18mm lug nut . Turn counterclockwise again to loosen and use WD40 or a penetrating fluid to help.

09. Here is a reminder of what you removed from this page and what tools are required. Note that the wedge washer is still on the axle in this photo.

l0. Note the tab gear washer , the orientation of which must be noted when reinstalling.

11. Place the levers, wire side up (to avoid stress) under the upper wheel lip and turn to loosen the bead. Run one of these around the rim lip to fully expose one side.


12. Using your hands (or with some help from the levers), pull the tire off the back of the wheel.

13. Take your time to wiggle the valve out of the front wheel. This can be harder than you think, but your patience will be rewarded. If the hose is already damaged it may be quicker to simply cut it around the valve stem to remove it.


14. Refitting the new hose can be a challenge in itself and was the most frustrating part of putting this guide together. Some lubrication can help. Valve window tolerances in the wheel can be incredibly tight . Many users have opened the "floating" part of this plastic hole with a rotary tool to make their life easier, but we recommend avoiding such destructive actions if you can. Once the valve is through, clip it and distribute the tube around the rim.


15. Working on a tire that is slightly above room temperature (leave it on a heater for some time beforehand) makes this job easier. Make sure the tire is properly oriented when reinstalling. With the wheel motor cable pointing up, the tread should point clockwise around the tire . To start, stand the wheel up, squeeze the hoop into an oval from the sides and push it over the top of the wheel, passing the wheel through so the hoop is now hooked over the wire.


16. Use the lever to press the rear side bead (without the cable) onto the lip . Take your time inserting the tube, being careful not to get pinched by the tire bead on the rim lip.

17. A second pair of hands helps with the last part. If you pry the top side bead onto the lip, you'll find the tire trying to oppose you by spinning and forcing off the rear that was previously seated. Slide open one side of the bead and have an assistant hold the lever in place while you work around the wheel. It may take a few tries, but you'll get there.

18. Replacing the screws and trim is the reverse of removal . Tighten the axle bolts but do not over tighten, use only hand tools. Inflate the tire and install the valve cap.
Watch where you ride! But seriously, a common preventive step is adding "tire slime" hose sealant (before you get a flat tire). This fills and seals an inner tube if punctured. In addition, it's important to ride with the correct tire pressure for the passenger's weight, oh, and of course don't forget to carefully inspect your tires for "foreign objects" before fitting a new tube.

yes we do If you need spare parts or accessories for your scooter, take a look at them in our webstore . We do not sell solid tires as we do not evaluate (at press time) the solutions currently on the market.

Unfortunately, we are currently unable to offer a tire/breakdown service for electric scooters. Your local bike shop may be willing to try their hand at work if you show them what this item is all about, or simply book a fitting service from us.